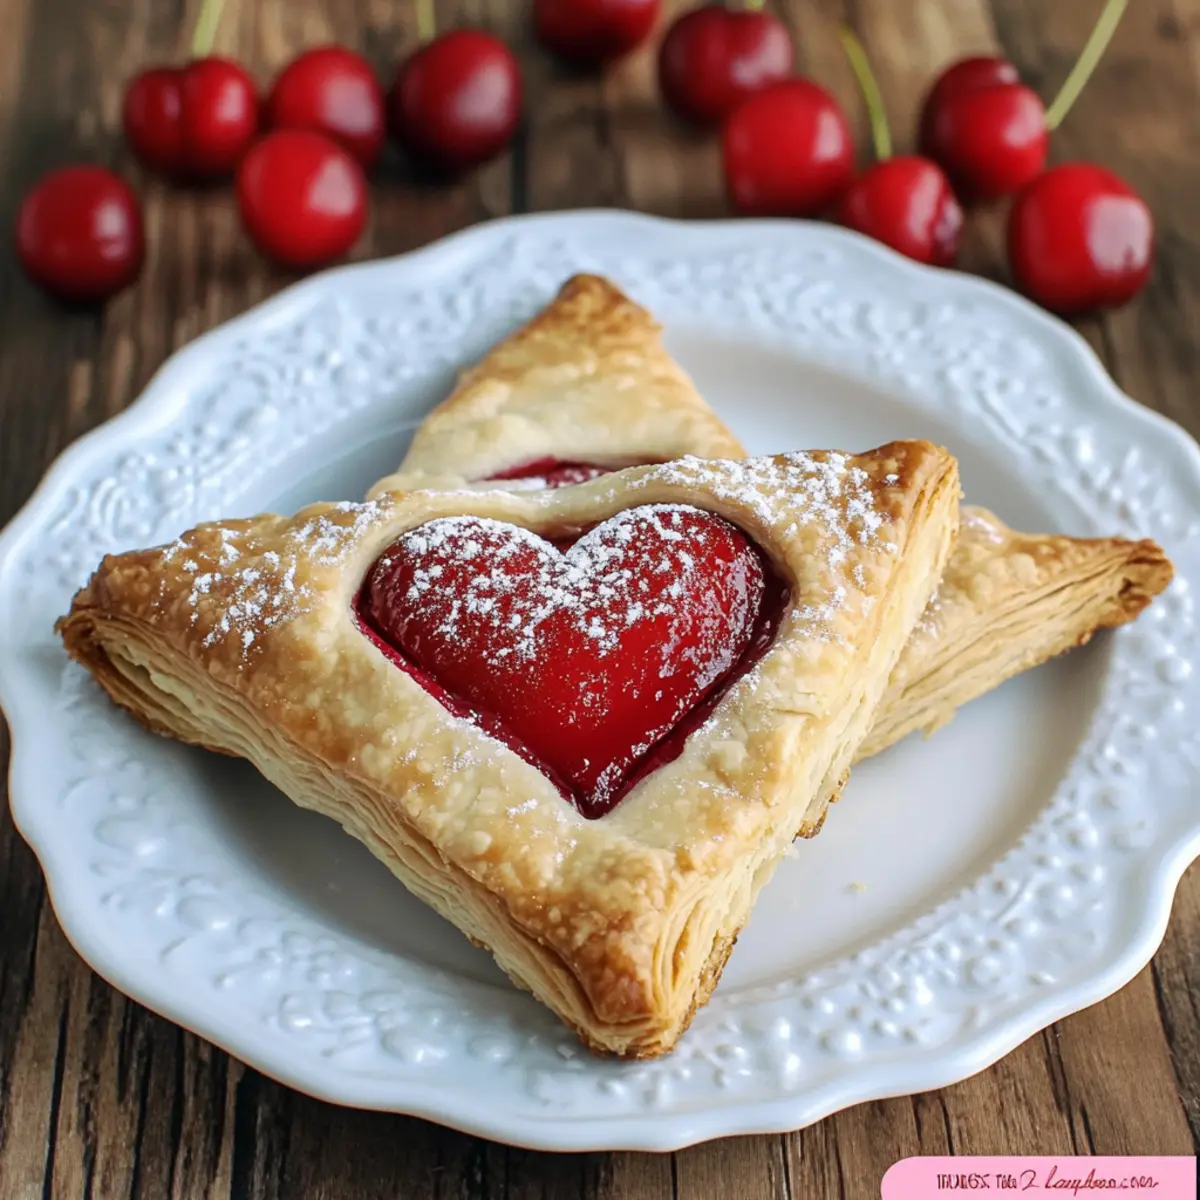
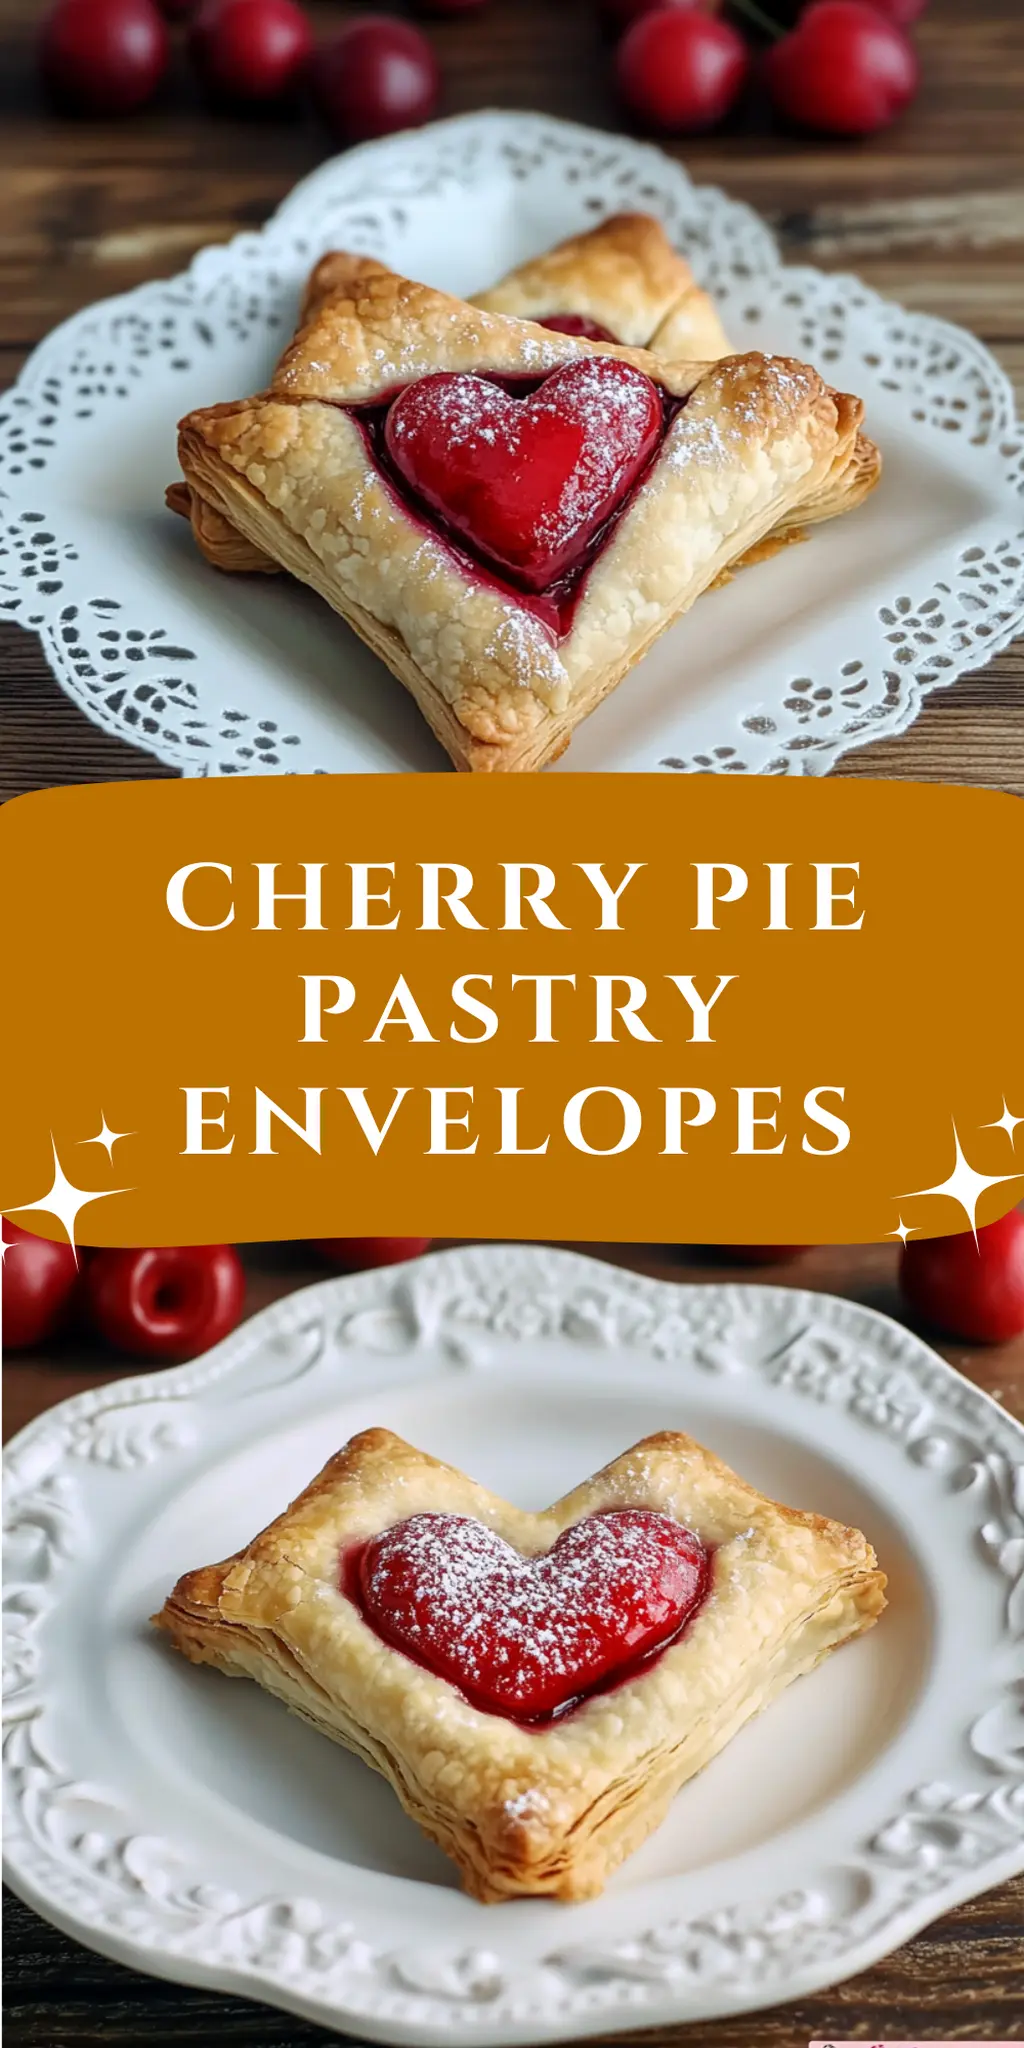
There’s something undeniably heartwarming about the smell of cherry pie wafting through the kitchen, evoking memories of family gatherings and lazy summer afternoons. The beauty of these Cherry Pie Pastry Envelopes lies not just in their delightful flavor, but in how effortlessly they bring a sense of nostalgia and joy to the table. When I first discovered this charming recipe, I was captivated by the whimsical heart-shaped design that transforms a classic dessert into an adorable treat perfect for any occasion.
These little pockets of cherry goodness are a game changer for anyone tired of the same old dessert routine. With just a few simple ingredients and only 40 minutes of your time, you can impress your friends and family with homemade sweet creations that look as fantastic as they taste. Whether you’re hosting a gathering, need an easy potluck option, or just want to indulge in something special, these pastry envelopes make every bite feel like a celebration. Let’s dive into this deliciously fun recipe that’s bound to become a favorite in your kitchen!
Why You'll Love This Cherry Pie Pastry Envelopes
- These Cherry Pie Pastry Envelopes are a breeze to make, allowing you to whip up a delightful dessert in just 40 minutes.
- Their heart-shaped design not only elevates the visual appeal but also adds a charming touch that is sure to impress your guests.
- The sweet and tangy cherry filling wrapped in flaky pastry creates an explosion of flavor that will have everyone coming back for seconds.
- Plus, they are versatile enough to be served at various occasions, making them a perfect addition to your dessert repertoire.
Cherry Pie Pastry Envelopes Ingredients
For the Pastry
- Refrigerated pie crust – a time-saver that guarantees flaky and delicious pastry without the fuss of making dough from scratch.
For the Filling
- Cherry pie filling – opt for a high-quality brand or homemade version to enhance the flavor of your Cherry Pie Pastry Envelopes.
For the Topping
- Sparkling sugar – adds a delightful crunch and a touch of sweetness, making your envelopes look extra special.
- Whipping cream – brush this over the pastries for a lovely glaze that helps the sugar adhere while adding richness.
For Assembly
- 4 x 5 inch paper envelope – helps shape the heart and can be used as a fun template for cutting your pastry.
- Heart-shaped cookie cutter – creates those adorable shapes that make these pastries even more delightful!
How to Make Cherry Pie Pastry Envelopes
-
Preheat your oven to 375°F (190°C). This step ensures that your Cherry Pie Pastry Envelopes bake evenly, achieving that perfect golden color.
-
Unroll the pie crust on a floured surface. Gently roll it out to maintain that flaky texture, ready to be transformed into delightful pockets!
-
Cut out heart shapes for the envelopes using your heart-shaped cookie cutter. Aim for a size that can hold a generous spoonful of cherry filling—around 4 inches wide works beautifully.
-
Spoon the cherry pie filling onto one heart-shaped crust. Place a nice dollop in the center, leaving room around the edges for sealing.
-
Seal the envelope with a second heart-shaped crust by pressing the edges together firmly. Ensure there are no gaps to keep the delicious filling secure during baking.
-
Brush the pastries with whipping cream. This acts as a delectable glaze that adds richness and helps the sparkling sugar to stick, enhancing both flavor and presentation.
-
Sprinkle the sparkling sugar generously over the tops. This will give your pastries a lovely texture and a touch of sweetness that glistens in the light.
-
Bake the envelopes in the preheated oven for 20-25 minutes until golden brown and fragrant. Keep an eye on them to catch that perfect moment of goodness!
-
Cool the pastries slightly before serving. They will be hot, and letting them rest for a few minutes allows the flavors to settle beautifully.
Optional: Serve with a dollop of whipped cream for an extra treat!
Exact quantities are listed in the recipe card below.
How to Store and Freeze Cherry Pie Pastry Envelopes
Room Temperature: Store Cherry Pie Pastry Envelopes in an airtight container for up to 2 days. Enjoy them fresh for the best flavor and texture!
Fridge: If you want to keep them a bit longer, refrigerate for up to 5 days in a sealed container. Reheat in a microwave or toaster oven for a few minutes before serving.
Freezer: For longer storage, freeze them unbaked or baked for up to 3 months. Place them in freezer-safe bags or airtight containers. Bake straight from the freezer, adding a few extra minutes to the cooking time.
Reheating: To reheat, place baked envelopes in a preheated oven at 350°F (175°C) for about 10-15 minutes. This restores their delicious crunch while warming the cherry filling inside.
What to Serve with Cherry Pie Pastry Envelopes?
Get ready to create a delightful dessert experience that will thrill your taste buds and warm your heart.
-
Vanilla Ice Cream: The creamy richness of vanilla ice cream perfectly balances the tart cherry filling, adding a luscious contrast to every bite.
-
Fresh Whipped Cream: Light and airy, whipped cream enhances the sweetness of the cherries, making your dessert feel indulgent and celebratory.
-
Chocolate Sauce: Drizzling warm chocolate sauce brings an extra layer of flavor that complements the cherries beautifully, creating a decadent treat.
-
Coffee or Tea: A warm cup of coffee or tea pairs wonderfully with these pastries, providing a comforting beverage that enhances the dessert experience.
-
Berry Salad: Tossed with fresh strawberries, blueberries, and a hint of mint, a berry salad offers a refreshing burst of flavor to balance the sweetness of the envelopes.
-
Lemonade or Iced Tea: A chilled glass of lemonade or iced tea can brighten the palate, making for a refreshing companion to these delightful pastries.
-
Almond Croissant: The nutty flavor of an almond croissant can enhance the cherry filling while providing an additional layer of texture to your dessert table.
-
Pecan Pie Bars: These flavorful bars introduce a warm, nutty crunch that plays wonderfully against the softness of the cherry filling, creating a delightful contrast.
Cherry Pie Pastry Envelopes Variations
Feel free to sprinkle your own creativity into these delicious pastry envelopes!
-
Berry Medley: Mix different berry fillings like blueberries or raspberries for a vibrant fruit explosion. The combination not only looks stunning but offers a delightful variety in taste.
-
Nutty Delight: Add a handful of chopped walnuts or almonds to the cherry filling for a satisfying crunch. The nutty flavor amplifies the richness of the sweet cherries, creating an irresistible bite.
-
Chocolate Drizzle: After baking, drizzle melted dark or white chocolate over the tops for an indulgent twist. This extra touch adds both sweetness and sophistication to your pastries.
-
Spiced Surprise: Sprinkle in a pinch of cinnamon or nutmeg to the cherry filling for a warm, comforting flavor. The spices lend a homey aroma, making each bite feel like a cozy hug.
-
Coconut Puff: Incorporate shredded coconut into the cherry filling for a tropical flair. The chewy texture pairs beautifully with the juicy cherries, offering a delightful surprise with every bite.
-
Savory Twist: Swap the cherry filling for a savory mixture of cream cheese and herbs for a unique appetizer. Serve these with a dipping sauce, and you’ve transformed your pastries into a fancy hors d’oeuvre.
-
Vegan Option: Use a plant-based pie crust and substitute the whipping cream with almond milk to create a vegan version that everyone can enjoy. This option maintains all the charm and flavor without the dairy.
-
Mini Envelopes: Use a smaller cookie cutter to make bite-sized pastry envelopes perfect for parties. These delightful little treats will be a hit at any gathering, encouraging guests to grab a few!
Make Ahead Options
These Cherry Pie Pastry Envelopes are a fantastic option for meal prep, making your baking endeavors seamless! You can prepare the heart-shaped pastry shells up to 24 hours in advance. Simply cut out the heart shapes and layer them between sheets of parchment paper to prevent sticking, then refrigerate. For best results, fill and seal the envelopes on the day you plan to bake them, which keeps the crust flaky and delicious. Once assembled, they can be stored in the refrigerator for up to 3 days before baking. Just brush with whipping cream, sprinkle with sugar, and pop them in the oven when you’re ready to serve. You’ll enjoy the delightful taste just as much without the stress of last-minute prep!
Chef's Helpful Tips
- When making Cherry Pie Pastry Envelopes, ensure your pie crust is chilled to maintain flakiness during baking.
- Avoid overfilling the hearts to prevent any spillover, which can affect their shape and texture.
- For a perfect seal, gently press the edges with a fork or your fingers to avoid any leaks while baking.
- Keep a close eye on the envelopes during the last few minutes in the oven, as they can quickly go from golden to burnt.
Cherry Pie Pastry Envelopes Recipe FAQs
How do I choose ripe cherries for making cherry filling?
Absolutely! When selecting cherries, look for ones that are firm, plump, and vibrant in color. Avoid cherries that have dark spots all over, as they may be overripe. Ideally, you want your cherries to be sweet and slightly tart for the best filling flavor.
How should I store leftover Cherry Pie Pastry Envelopes?
Very! Store your Cherry Pie Pastry Envelopes in an airtight container at room temperature for up to 2 days for maximum crispness. If you need to keep them longer, they can be refrigerated for up to 4 days. Just place them in a covered container to prevent them from drying out.
Can I freeze these pastries, and how?
Definitely! To freeze your Cherry Pie Pastry Envelopes, I recommend freezing them unbaked. Simply wrap each one tightly in plastic wrap, then place them in a freezer bag. They can be stored in the freezer for up to 3 months. When you’re ready to enjoy them, bake from frozen at 375°F (190°C) for about 25-30 minutes until they’re heated through and golden brown.
What should I do if my pastry dough is too sticky to work with?
No worries! If your dough is sticky, it’s best to lightly dust your work surface with additional flour while rolling out the pie crust. If the dough is still misbehaving, chill it in the refrigerator for about 15-20 minutes; this will make it easier to handle and roll out beautifully.
Can I use a different type of filling for these pastry envelopes?
Absolutely! While cherry is a classic choice, feel free to get creative. You can use other fruit fillings like blueberry, apple, or peach. If you’re considering a savory twist, try filling them with a mixture of cooked vegetables and cheese for a delightful appetizer. Just remember to adjust the sweetness accordingly!
Cherry Pie Pastry Envelopes
Ingredients
Equipment
Method
- Preheat oven to 375°F (190°C).
- Gently unroll the refrigerated pie crust on a floured surface.
- Use a cookie cutter to cut out heart shapes from the pie crust.
- Place a spoonful of cherry filling on one heart-shaped crust.
- Seal with a second heart-shaped crust, pressing edges together.
- Brush tops with whipping cream for glaze.
- Sprinkle sparkling sugar on top.
- Bake on a baking sheet for 20-25 minutes until golden brown.
- Cool for a few minutes before serving.