Nothing beats the warm, inviting aroma of a cheesy dip bubbling away in the oven, especially when it’s as easy to make as this Cheesy Bean Dip. After a long day, coming home to the promise of creamy refried beans paired with savory cheddar cheese is a true delight. I first whipped this up for a casual game night with friends, and the way everyone dove into it was a glowing endorsement of its crowd-pleasing magic.
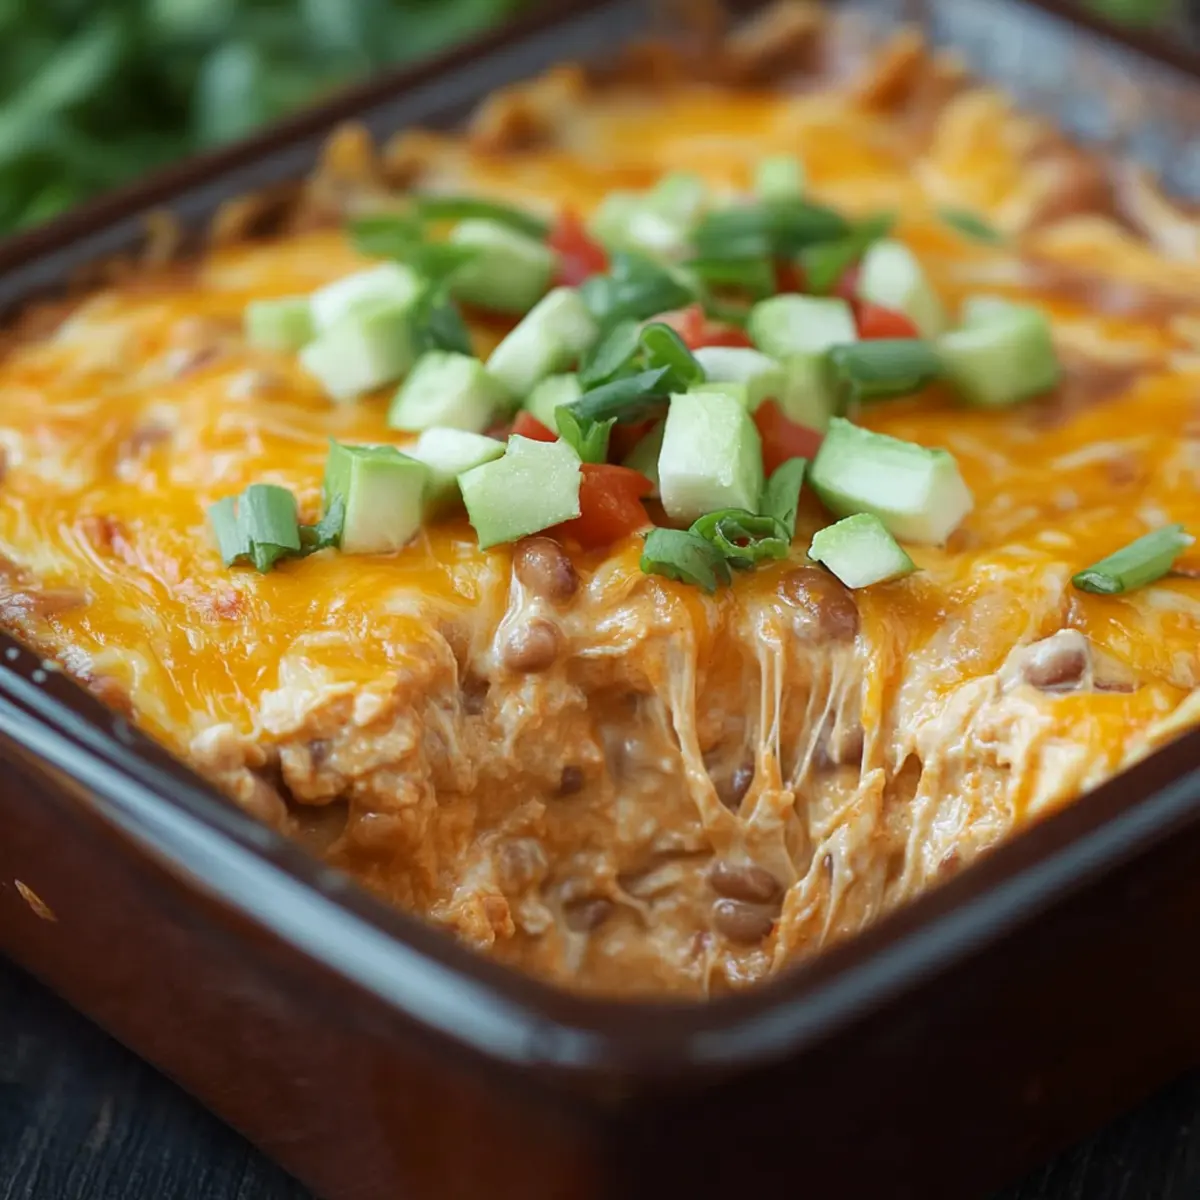
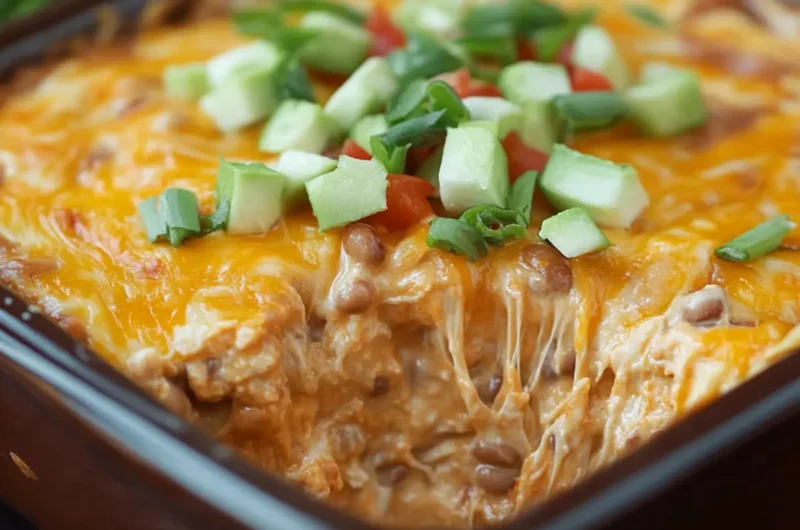
Imagine gathering around a table, tortilla chips in hand, as you scoop into this cheesy wonder, garnished with fresh tomatoes and zesty green onions. It’s the kind of dish that brings people together and instantly elevates any gathering, whether it’s a cozy family dinner or a lively potluck. With just 10 minutes of prep and 30 minutes in the oven, you can create a dish that not only satisfies cravings but also impresses.
Let’s dive into this irresistible recipe, where every bite is a reminder that homemade comfort can be quick and delicious!
Why You'll Love This Cheesy Bean Dip
- This Cheesy Bean Dip is incredibly easy to whip up, requiring just 10 minutes of prep time before it goes into the oven for a quick bake.
- The flavor combination of creamy refried beans and melty cheddar cheese creates a deliciously satisfying dip that will have everyone coming back for more.
- Its versatility allows it to be served at any occasion, from game nights to family gatherings, making it a perfect crowd-pleasing dish.
- Visually, the dip garnished with fresh tomatoes and green onions is as appealing as it is tasty, making it a standout centerpiece on your appetizer table.
Cheesy Bean Dip Ingredients
• Discover the key components for this scrumptious Cheesy Bean Dip!
For the Dip
• 30 ounces refried beans – the creamy base that adds rich texture.
• 8 ounces cream cheese – make sure it’s softened for a smooth blend.
• 1/2 cup salsa – adds a kick of flavor; choose your favorite style!
• 1/2 cup sour cream – for a tangy creaminess that balances the flavors.
• 3 cups shredded cheddar cheese – reserve 2 cups for topping and don’t skimp on quality!
• 1 tablespoon taco seasoning – this adds a delicious depth of flavor.
For the Garnish
• 1/2 cup diced tomatoes – fresh and juicy, these add a pop of color.
• 2 large sliced green onions – they provide a delightful crunch and zest.

How to Make Cheesy Bean Dip
- Mix refried beans and cream cheese in a large bowl until the mixture is smooth and creamy, ensuring a delightful base for your dip.
- Stir in the salsa and sour cream, blending until well combined. The mixture should have a cohesive texture and a vibrant color.
- Fold in 1 cup of shredded cheddar cheese along with the taco seasoning, ensuring even distribution for that cheesy flavor.
- Preheat your oven to 350°F. Spread the mixture evenly in a baking dish, making sure to reach all corners for a lovely, bubbly finish.
- Top with the remaining 2 cups of shredded cheddar cheese. This extra layer of cheese will create that gooey, melty goodness we all love!
- Bake for 30 minutes or until the dip is bubbly and golden brown on top; you’ll know it’s ready when the aroma fills your kitchen!
- Garnish with diced tomatoes and sliced green onions just before serving, adding a fresh and colorful touch to your cheesy delight.
Optional: Serve with your favorite tortilla chips or fresh veggies for dipping!
Exact quantities are listed in the recipe card below.
Cheesy Bean Dip Variations
Feel free to get creative and tailor this beloved dip to fit your taste or dietary needs!
- Spicy Kick: Add diced jalapeños or a few dashes of hot sauce for an extra layer of heat, perfect for spice lovers!
- Vegan Alternative: Substitute cream cheese and sour cream with cashew cream or a store-bought vegan alternative for a delicious plant-based version.
- Herbed Fiesta: Sprinkle in some fresh cilantro or parsley for a vibrant flavor boost, making the dip taste even fresher.
- Bacon Bliss: Top the dip with crispy bacon bits before baking for a savory crunch that will take your dip to the next level.
Instead of serving just the basic version, imagine presenting a platter of assorted toppings and mix-ins where everyone can create their ideal cheesy dip experience!
- Smoky Flavor: Use smoked cheddar or add a teaspoon of liquid smoke for a rich, delightful flavor profile that’s truly irresistible.
- Bean Variety: Combine black beans or pinto beans with the refried beans for a twist in texture and a burst of extra flavor.
- Cheesy Blend: Swap some cheddar for pepper jack cheese for a zesty touch, giving you that delightful creamy heat.
Let your imagination run wild with these variations, and make this Cheesy Bean Dip your own tasty creation!
How to Store and Freeze Cheesy Bean Dip
Fridge: Keep your Cheesy Bean Dip in an airtight container for up to 3 days. Reheat in the oven or microwave until heated through.
Freezer: For longer storage, freeze the dip in a freezer-safe container for up to 2 months. Thaw in the fridge overnight before reheating.
Reheating: When ready to enjoy leftovers, reheat in the oven at 350°F for about 15-20 minutes or until bubbly. Stir halfway through for even warming.
Wrapping: If stored in the freezer, wrap it tightly with plastic wrap before placing it in a container to prevent freezer burn.
Make Ahead Options
This Cheesy Bean Dip is a fantastic meal prep option, making it perfect for busy weeknights or impromptu gatherings! You can prepare the dip mixture (refried beans, cream cheese, salsa, sour cream, and taco seasoning) and refrigerate it for up to 3 days before baking. Simply store it in an airtight container to maintain its delicious flavors. When you’re ready to enjoy, preheat your oven, spread the dip in your baking dish, top with shredded cheddar cheese, and bake as directed. With these make-ahead tips, your cheesy, nostalgic dip will be just as delightful and ready to impress your guests with minimal effort!
What to Serve with Cheesy Bean Dip?
Let’s elevate your snack game by pairing this cheesy delight with some delicious accompaniments that will bring out its flavors.
- Tortilla Chips: The classic companion! Their crunch provides a satisfying contrast to the creamy dip, perfect for scooping.
- Vegetable Platter: Fresh carrots, celery, and bell peppers add a refreshing crunch and balance the richness of the dip, making each bite pop.
- Guacamole: This creamy, avocado goodness complements the cheesy bean dip beautifully, adding a smooth texture and a touch of zest.
- Pico de Gallo: Bright and tangy, this fresh salsa adds a vibrant flavor that cuts through the richness of the dip, creating a delightful balance on your palate.
- Beer: A pale ale or light lager pairs perfectly, the carbonation enhances flavors and makes each cheesy bite feel extra special.
- Margaritas: The citrusy freshness of a margarita complements the savory notes of the dip, making for an inviting drink pairing.
- Quesadillas: Serve with easy-to-make quesadillas filled with cheese and veggies for a hearty addition that everyone will love.
- Roasted Corn Salad: This sweet and smoky salad introduces a delightful texture and flavor contrast that elevates your snack spread.
- Spicy Jalapeño Poppers: For heat seekers, these poppers provide a perfect fiery kick that pairs wonderfully with the cheesy goodness of your dip.
Chef's Helpful Tips
- To achieve the best texture in your Cheesy Bean Dip, make sure your cream cheese is softened to room temperature before mixing.
- A common mistake is not mixing the refried beans and cream cheese thoroughly, which can result in a lumpy dip; aim for a smooth consistency.
- When adding the taco seasoning, mix it in evenly to ensure every bite is packed with flavor.
- Remember to preheat your oven to 350°F before baking for even cooking, and keep an eye on the dip towards the end of the cooking time to prevent over-browning.
Cheesy Bean Dip Recipe FAQs
What type of refried beans should I use?
Absolutely! I recommend using traditional canned refried beans for this recipe. Look for those without added preservatives or flavors, as they will provide a rich, creamy base. If you want to switch things up, consider using vegetarian or black bean refried beans for a different flavor profile.
How long can I store Cheesy Bean Dip in the fridge?
Very! Your Cheesy Bean Dip will stay fresh in an airtight container in the fridge for up to 3 days. When you’re ready to enjoy it again, reheat in the oven at 350°F for about 15 minutes until it’s warmed through. You can also zap it in the microwave for a quicker option.
Can I freeze Cheesy Bean Dip?
Yes! You can freeze the Cheesy Bean Dip for up to 2 months. To do so, let it cool completely, then transfer it to a freezer-safe container. Be sure to cover it tightly with plastic wrap before sealing the lid to avoid freezer burn. When ready to enjoy, simply thaw it overnight in the fridge and reheat as instructed.
What if my Cheesy Bean Dip is too thick?
If you find your dip is too thick, don’t worry! You can easily fix this by adding a splash of milk or sour cream while reheating. Gradually mix it in until you reach your desired consistency. Additionally, using warm salsa can also help loosen it up for a smoother dip!
Are there any dietary considerations I should be aware of?
Definitely! Always double-check the ingredient labels for any potential allergens. For dairy allergies, you could substitute the cream cheese and sour cream with plant-based alternatives. If you’re serving guests with dietary restrictions, consider using gluten-free tortilla chips and homemade salsa to ensure everyone can enjoy this delicious Cheesy Bean Dip!
Cheesy Bean Dip
Ingredients
Equipment
Method
- Mix refried beans and cream cheese in a large bowl until the mixture is smooth and creamy.
- Stir in the salsa and sour cream, blending until well combined.
- Fold in 1 cup of shredded cheddar cheese along with the taco seasoning.
- Preheat your oven to 350°F. Spread the mixture evenly in a baking dish.
- Top with the remaining 2 cups of shredded cheddar cheese.
- Bake for 30 minutes or until the dip is bubbly and golden brown on top.
- Garnish with diced tomatoes and sliced green onions just before serving.