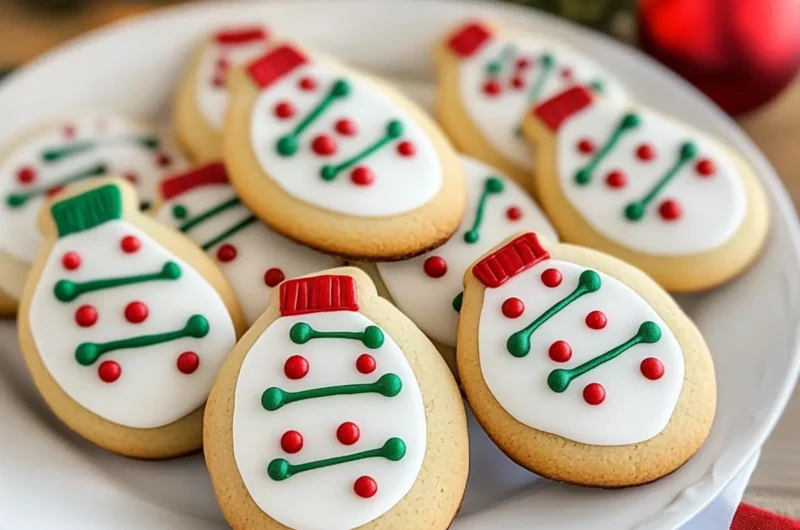
As the first hints of winter grace the air, my kitchen transforms into a cozy sanctuary filled with the sweet scents of nostalgia. A sprinkle of cinnamon here, a dash of vanilla there, and before I know it, I’m enveloped in the warm embrace of holiday spirit. One of my all-time favorite holiday traditions is baking Christmas Light Cookies, a delightful treat that captures the joy of the season in both flavor and sight.
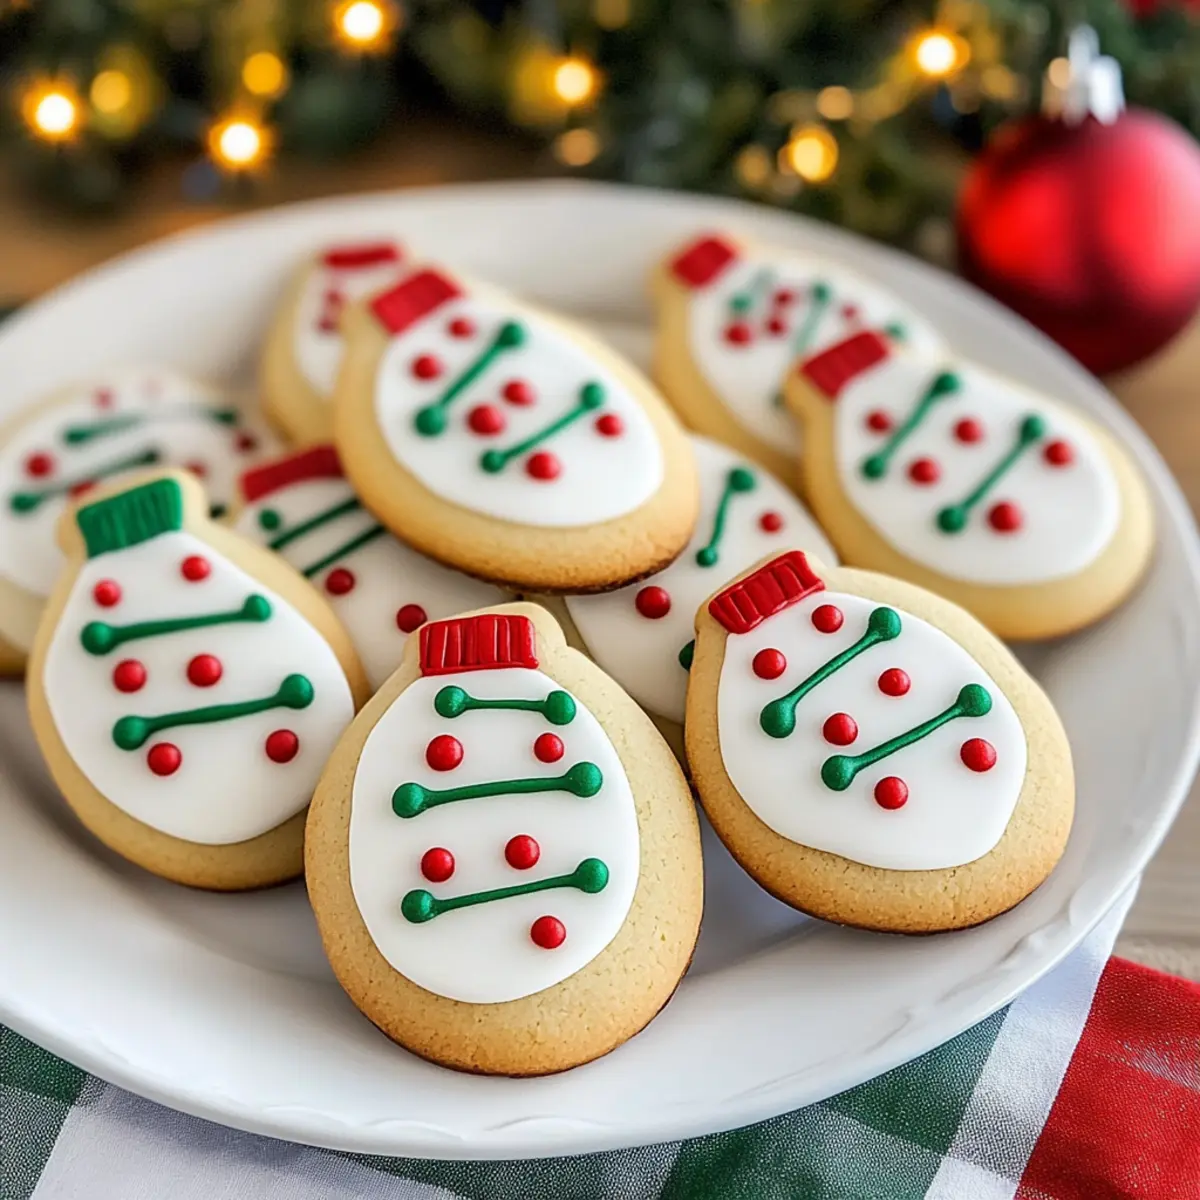
I stumbled upon this colorful gem during a baking spree that began when I wanted to reclaim my kitchen from the monotony of takeout. And let me tell you, there’s something truly magical about shaping dough into twinkling light bulbs that brings a playful twist to classic cookie-making. They’re not just a feast for the eyes; each bite offers a buttery sweetness that pairs perfectly with a hot cup of cocoa.
Join me as we dive into this easy and charming recipe that’s perfect for family gatherings or festive cookie swaps. Your loved ones will be dazzled, and you’ll feel the joy of creating memories one delicious cookie at a time!
Why You'll Love This Christmas Light Cookies
- This recipe is incredibly easy to follow, making it perfect for bakers of all skill levels.
- The flavor is a delightful blend of buttery sweetness that will have everyone coming back for seconds.
- These cookies are versatile enough to decorate in any colors you choose, allowing for a personal touch that enhances their visual appeal.
- Plus, they make a stunning centerpiece for holiday gatherings, delighting both kids and adults alike with their festive shapes.
Christmas Light Cookies Ingredients
Get ready to create festive magic!
For the Dough
- All-purpose flour – This forms the base of your cookies, providing structure and texture.
- Granulated sugar – Adds sweetness and helps create a light, fluffy texture.
- Unsalted butter – Using softened butter ensures your dough is creamy and flavorful; you can substitute with margarine if preferred.
- Eggs – Incorporate richness and help bind the ingredients together for a perfect cookie.
- Baking powder – This leavening agent gives your cookies a delightful rise, making them soft and airy.
- Vanilla extract – A splash of this adds warmth and complexity to the flavor profile.
For the Decoration
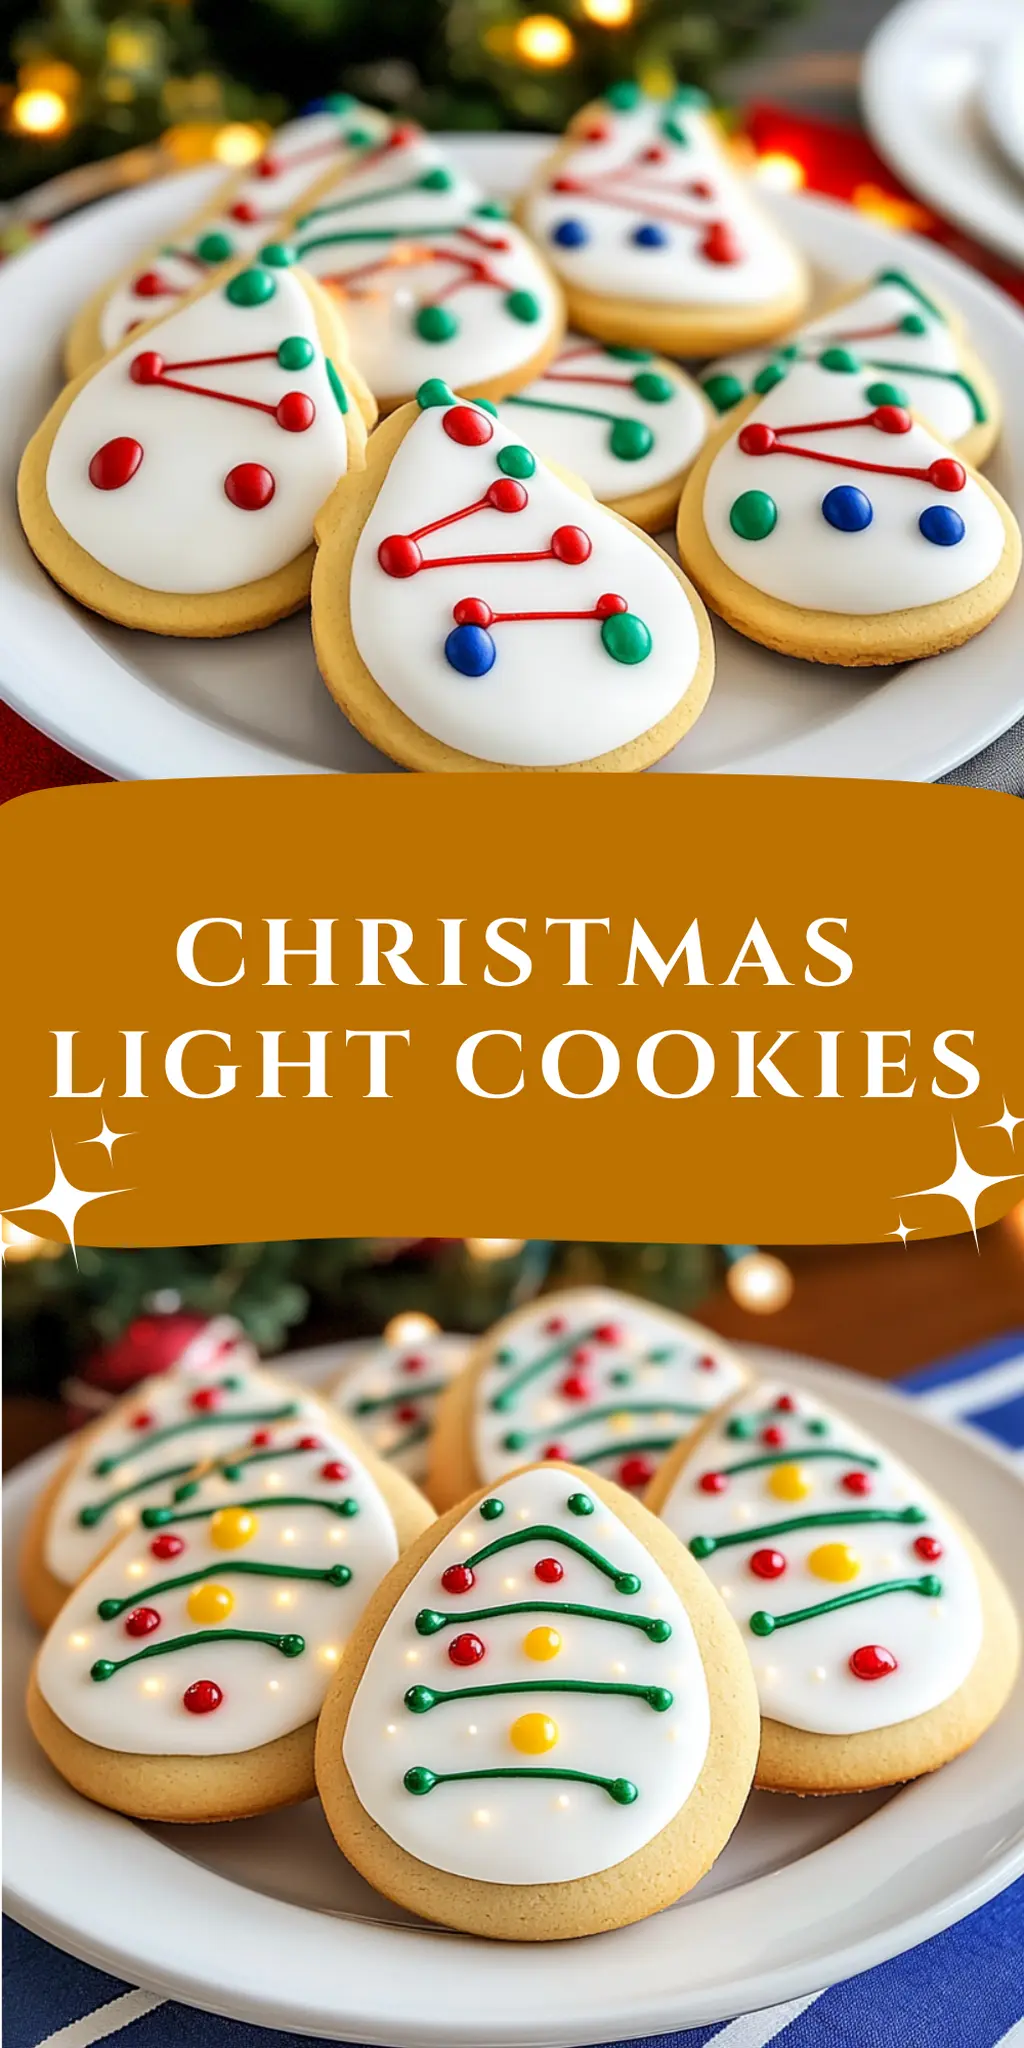
- Food coloring – Get creative! Use various colors to transform your cookies into vibrant light bulbs that brighten any holiday gathering.
- Powdered sugar – Essential for icing, it provides just the right sweetness and smooth texture for decorating your Christmas Light Cookies.
Let’s get baking and make some unforgettable festive treats!
How to Make Christmas Light Cookies
-
Preheat your oven to 350°F (175°C) and line two baking sheets with parchment paper. This ensures your cookies bake evenly and don’t stick, giving you perfectly shaped treats!
-
Cream together the softened butter and granulated sugar until fluffy. This step is key for a light texture! Once creamy, add the eggs one at a time, mixing in the vanilla extract for wonderful flavor.
-
Whisk together the flour and baking powder in a separate bowl. Gradually add this dry mixture to the wet ingredients until well combined, creating a dough that’s ready for chilling.
-
Chill the dough in the refrigerator for about an hour. This helps it maintain its shape while baking, ensuring your light bulbs look bright and beautiful!
-
Roll out the chilled dough on a floured surface to about ¼ inch thick. Then, cut into light bulb shapes using cookie cutters, adding a touch of whimsy to your holiday baking.
-
Bake in your preheated oven for 8-10 minutes, until the edges are lightly golden brown. Allow the cookies to cool completely on a wire rack before decorating them with colored icing.
Optional: Sprinkle with edible glitter for an extra festive touch!
Exact quantities are listed in the recipe card below.
What to Serve with Christmas Light Cookies?
Create a festive symphony of flavors that complements the delightful sweetness of these cookies.
- Hot Cocoa: Rich and creamy, hot cocoa brings warmth and nostalgia, making it the perfect drink to enjoy with your cookies.
- Milk: A classic pairing, ice-cold milk enhances the buttery sweetness and cuts through the sugar for a balanced treat.
- Peppermint Bark: With its crunchy texture and refreshing mint flavor, peppermint bark introduces a delightful contrast to the soft cookies.
- Gingerbread Milkshake: This spiced treat adds a whimsical twist, combining nostalgic flavors that echo the holiday season.
- Fruit Salad: Fresh and vibrant, a fruit salad introduces a burst of color and natural sweetness, balancing out the richness of the cookies.
- Spiced Chai Tea: The warm, aromatic spices in chai tea harmonize beautifully with the flavors of your Christmas Light Cookies.
- Chocolate Dipped Pretzels: Crunchy and sweet, these pretzels offer a delightful contrast in texture to your smooth, decorated cookies.
- Pecan Pie Bars: Indulge in the nutty sweetness of pecan pie bars for a decadent dessert duo sure to impress during holiday gatherings.
Christmas Light Cookies Variations
Feel free to add your own personal flair to these delightful cookies and create a batch your family will love!
-
Gluten-Free: Use a 1:1 gluten-free flour blend for a celiac-friendly version that everyone can enjoy without missing out on flavor.
-
Vegan: Swap out the eggs for flaxseed meal mixed with water and use vegan butter. These cookies will still shine with delicious sweetness!
-
Chocolate Chip: Add 1 cup of miniature chocolate chips to the dough for a delightful twist that pairs beautifully with the sugary icing.
-
Nutty: Mix in ½ cup of finely chopped nuts, such as walnuts or pecans, for an added crunch that complements the soft texture of the cookies.
-
Spiced: Incorporate 1 teaspoon of cinnamon and a pinch of nutmeg into the dough for a festive flavor that brings the warmth of the season into every bite.
-
Citrus Zest: Add the zest of one lemon or orange to the dough for a refreshing burst of flavor that brightens the whole cookie!
-
Peppermint Crunch: Crush up some peppermint candies and fold them into the dough for a holiday-inspired kick that will excite your taste buds.
-
Dried Fruit: Mix in ½ cup of dried cranberries or raisins for a chewy texture that balances the sweetness, creating a delightful cookie experience.
Make Ahead Options
These Christmas Light Cookies are perfect for busy home cooks looking to save time during the hectic holiday season! You can prepare the dough up to 24 hours in advance by following steps 1-3, then wrap it tightly in plastic wrap and refrigerate. Alternatively, if you’re absolutely ahead of the game, you can freeze the rolled-out shapes in an airtight container for up to 3 months; just ensure to layer parchment paper between the cookies to prevent sticking. When you’re ready to bake, simply take the dough or cookie shapes out of the refrigerator or freezer, let them thaw in the fridge overnight, and proceed with the baking instructions. This way, your Christmas Light Cookies will be just as delightful and fresh, ready to charm your family and friends with their festive flavors!
Storage Tips for Christmas Light Cookies
-
Room Temperature: Keep your Christmas Light Cookies in an airtight container at room temperature for up to 3 days. This will help retain their freshness and soft texture.
-
Fridge: For longer storage, you can place them in the fridge for up to a week. Just remember to allow them to come back to room temperature before enjoying!
-
Freezer: If you want to savor your cookies even longer, freeze them for up to 3 months. Wrap each cookie individually in plastic wrap, then place them in a freezer-safe bag or container.
-
Reheating: To enjoy your cookies warm, simply microwave them for about 10-15 seconds. This brings back their delightful flavors and soft texture, perfect for pairing with a cup of cocoa!
Chef's Helpful Tips
- When making Christmas Light Cookies, ensure your butter is softened to room temperature for easier creaming with sugar, which contributes to a lighter texture.
- Avoid over-mixing once you add the flour, as this can lead to tougher cookies; mix just until combined for the best results.
- Chilling the dough is essential, so plan for that hour in advance to help your cookies keep their shape while baking.
- Always keep an eye on the baking time and temperature, as ovens can vary; take them out when the edges are lightly golden for the perfect balance of chewy and crisp.
Christmas Light Cookies Recipe FAQs
What should I look for when selecting ingredients, especially flour and butter?
Absolutely! For the best Christmas Light Cookies, go for all-purpose flour that is fresh—check the package date to avoid any staleness. When selecting butter, choose unsalted, preferably from a brand you trust. Make sure it’s softened but not melted; you can easily achieve this by leaving it out at room temperature for about 30 minutes before you start your baking.
How should I store my Christmas Light Cookies, and how long do they last?
Very! Store your cookies in an airtight container at room temperature for up to 3 days to keep them fresh and maintain their softness. If you want them to last longer, you can also refrigerate them for up to a week, but make sure they come to room temperature before enjoying.
Can I freeze my Christmas Light Cookies? If so, how?
Of course! Freezing is a fantastic option for enjoying these cookies later. Wrap each cookie individually in plastic wrap, ensuring they’re fully covered to prevent freezer burn. Then, place them in a freezer-safe bag or container. They’ll keep well for up to 3 months. To enjoy, simply thaw them at room temperature or microwave for about 10-15 seconds to regain that delightful softness.
What common baking issues might I face, and how can I fix them?
If your cookies spread too much during baking, it might be due to warm dough or too little flour. Next time, ensure your butter is softened, not melted, and consider chilling your dough longer. On the flip side, if they are too hard, try not to overmix after adding flour. Remember, a light touch is key to keeping them soft and chewy!
Are there any dietary considerations I should take into account?
Definitely! For those with allergies, be cautious as this recipe contains gluten (from the flour) and dairy (from the butter). If baking for kids or friends with dietary restrictions, consider substituting the butter with a dairy-free alternative and ensuring the food coloring is suitable for vegan diets. Always check labels and consult with your guests about their food preferences.
What if I want to customize the icing colors?
The more the merrier! You can use gel-based or liquid food coloring to create vibrant icings. For a festive touch, separate your icing into multiple bowls and mix in different colors of food coloring. You can also mix colors for creative blends! Just remember—start with a small amount; you can always add more until you reach the desired shade. Happy decorating!
Christmas Light Cookies
Ingredients
Equipment
Method
- Preheat your oven to 350°F (175°C) and line two baking sheets with parchment paper.
- Cream together the softened butter and granulated sugar until fluffy. Add the eggs one at a time, mixing in the vanilla extract.
- Whisk together the flour and baking powder in a separate bowl. Gradually add this dry mixture to the wet ingredients until well combined.
- Chill the dough in the refrigerator for about an hour.
- Roll out the chilled dough on a floured surface to about ¼ inch thick. Cut into light bulb shapes using cookie cutters.
- Bake in your preheated oven for 8-10 minutes, until the edges are lightly golden brown. Allow the cookies to cool before decorating.