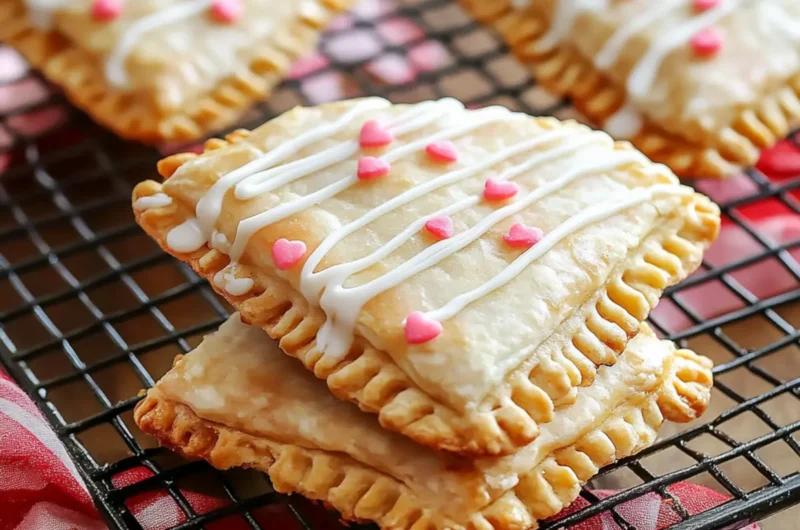
There’s something utterly delightful about the childhood nostalgia wrapped in homemade treats. The moment you bite into a warm, flaky crust loaded with sweet strawberry jam, a wave of comfort fills the air. Making Homemade Pop Tarts has been a joyful kitchen adventure for me, transforming a simple breakfast into a delightful pastry reminiscent of simpler times. With just a few ingredients and a touch of creativity, you can recreate this favorite in minutes, proving that homemade doesn’t have to be complicated.
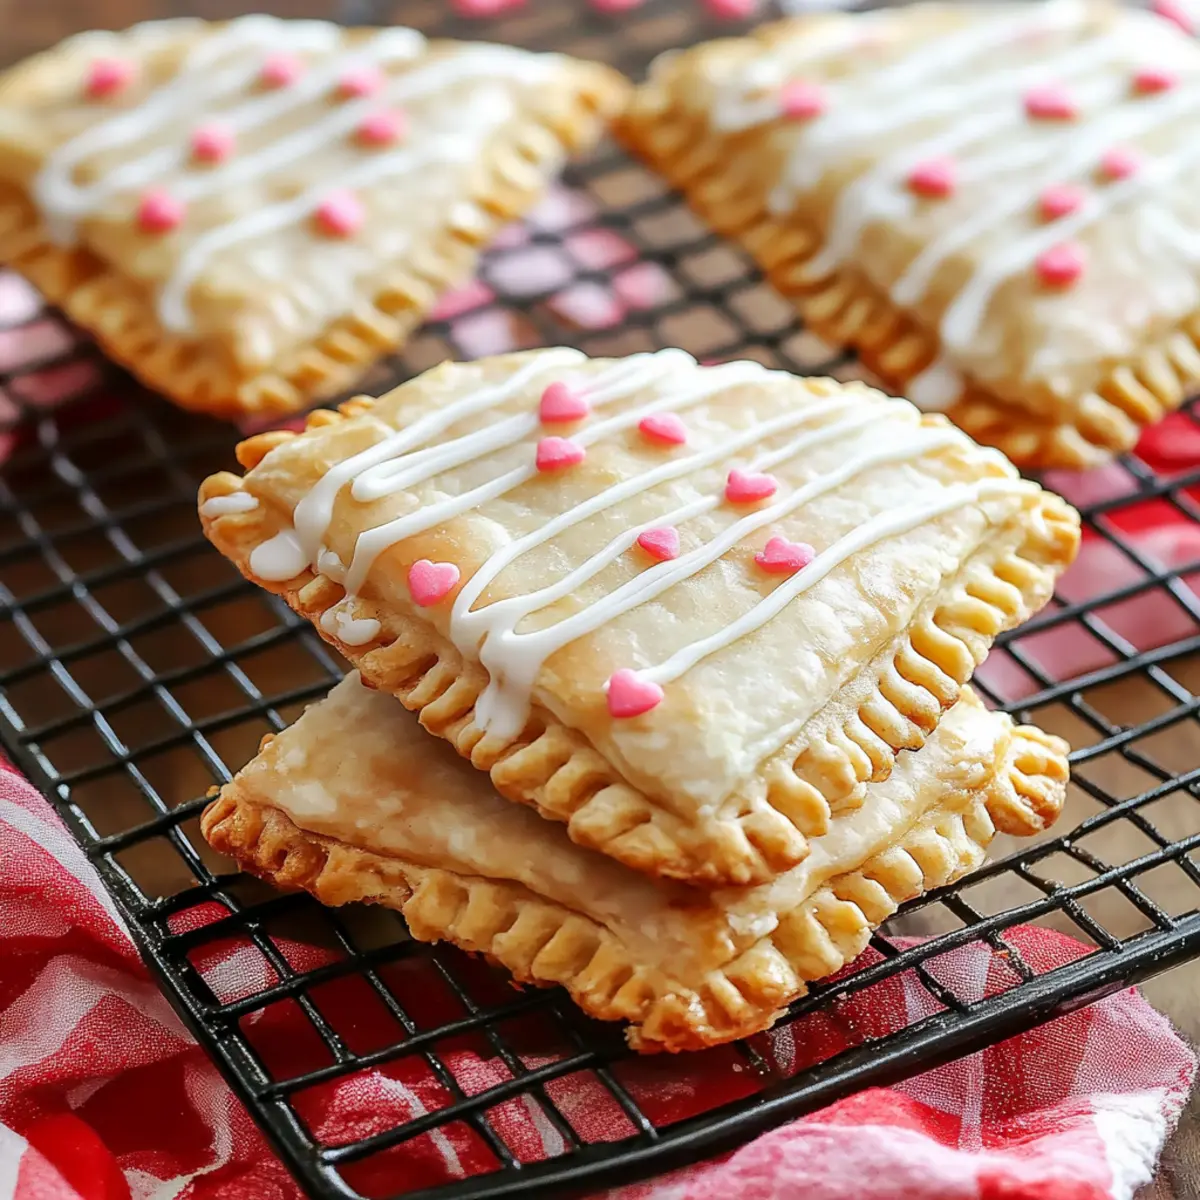
Imagine the happiness on your loved ones’ faces as they discover these charming, heart-shaped delights, beautifully decorated with sprinkles. Not only are they a feast for the eyes, but they also offer a burst of flavor that fast food simply can’t compete with. Whether you’re crafting these for a cozy brunch or simply to satiate a sweet craving, they’re an inviting way to express love through cooking. So, let’s jump in and whip up a batch of these delightful Homemade Pop Tarts that will surely become a favorite in your home!
Why You'll Love This Homemade Pop Tarts
- This recipe is incredibly easy to make, allowing you to whip up a batch in just over half an hour.
- The flavor is absolutely irresistible, with the sweet strawberry jam perfectly complementing the flaky crust.
- These Homemade Pop Tarts are also versatile since you can fill them with any jam or sweet filling you love.
- Visually, their charming heart shapes and colorful sprinkles make them a delightful addition to any table, making them perfect for impressing family and friends.
Homemade Pop Tarts Ingredients
For the Crust
• Refrigerated Premade Pie Crusts – a time-saver that gives you a flaky texture without the fuss.
For the Filling
• Strawberry Jam – provides a sweet, fruity center; feel free to swap it out for your favorite flavor to customize your Homemade Pop Tarts!
For the Topping
• Egg – acts as a wash to achieve a lovely golden finish on your pastries.
• Confectioners Sugar – sweetens up your icing for a delicious drizzle.
• Milk – helps achieve the perfect creamy consistency for the icing.
• Vanilla Extract – adds depth and a hint of warmth to your icing flavor.
• Red Food Coloring – a drop enhances the visual appeal of your icing.
• Sprinkles – brings a festive touch and a fun crunch on top.

How to Make Homemade Pop Tarts
-
Preheat your oven to 400°F. This essential step ensures your Homemade Pop Tarts bake evenly and become delightfully golden brown.
-
Unroll the refrigerated pie crusts on a flat surface. Keep them as flat as possible to maintain their shape and create a beautiful pastry.
-
Cut out heart shapes using a cookie cutter. These charming shapes will make your Homemade Pop Tarts not only tasty but visually appealing as well!
-
Spread strawberry jam on half of the hearts, leaving a small border around the edges. This sweet filling will ooze deliciously when baked, so be generous but careful!
-
Beat the egg and brush it on the edges of the hearts. This egg wash acts as glue, ensuring that your pastry edges seal nicely.
-
Seal the hearts with another crust piece and crimp the edges. Press firmly to keep the filling in and give your pop tarts a lovely, rustic look.
-
Poke steam holes in the tops and brush with egg wash. These holes allow steam to escape while baking, preventing sogginess and maximizing that golden shine.
-
Bake for 10-12 minutes until golden brown. Keep an eye on them as they bake to achieve that perfect color and flaky texture.
-
Cool on a wire rack before icing. Allow these beauties to cool slightly to ensure the icing doesn’t melt away!
-
Mix icing ingredients and decorate with sprinkles. A sprinkle of color adds that festive finishing touch, making your Homemade Pop Tarts irresistibly charming!
Optional: Try using different fillings like chocolate or apple for a fun twist!
Exact quantities are listed in the recipe card below.
How to Store and Freeze Homemade Pop Tarts
Room Temperature: Keep your Homemade Pop Tarts in an airtight container at room temperature for up to 2 days to maintain their flaky texture.
Fridge: For longer freshness, store them in the fridge in an airtight container; they’ll stay good for about 4 days, keeping the filling flavorful.
Freezer: You can freeze baked Homemade Pop Tarts for up to 2 months. Wrap them tightly in plastic wrap and then place them in a freezer bag to prevent freezer burn.
Reheating: To reheat, pop them in a preheated oven at 350°F for about 10 minutes. This will restore their crispiness while warming the filling.
What to Serve with Homemade Pop Tarts?
Elevate your breakfast or cozy brunch with delightful side dishes that perfectly complement these warm, sweet pastries.
-
Fresh Fruit Salad: A vibrant mix of seasonal fruits adds a refreshing contrast to the sweetness of the pop tarts. Think juicy berries, tangy kiwi, and sweet melons, creating a colorful bowl that’s as pleasing to the eye as it is to the palate.
-
Yogurt Parfait: Creamy yogurt layered with granola and fruit brings a smooth texture that balances the flaky crust of the pop tarts. Top with honey for a little extra sweetness — a delightful way to start your day!
-
Savory Breakfast Sandwiches: A warm, buttery croissant or toasted English muffin with egg and cheese offers a satisfying savory contrast. The richness pairs perfectly with the strawberry filling, ensuring no one leaves the table hungry.
-
Coffee or Herbal Tea: A warm cup enhances the experience, cutting through the sweetness of the pop tarts. Opt for a rich coffee to start your morning or a soothing herbal tea for a cozy afternoon treat.
-
Milkshake or Smoothie: A thick banana milkshake or a strawberry smoothie can turn these pop tarts into a fun dessert option! The creamy texture adds a rich delight that makes every bite enjoyable.
-
Chocolate Drizzle: For those with a sweet tooth, melt some chocolate and drizzle it over your pop tarts for an indulgent touch. The bold cocoa flavor beautifully enhances the fruity jam.
-
Nutella with Sliced Bananas: Spread a layer of Nutella on a pop tart and top it with fresh banana slices. This combination offers a smooth, chocolatey contrast to the crunchy pastry — pure bliss in every bite!
Homemade Pop Tarts Variations
Feel free to sprinkle your own twist on these delightful pastries and make them truly yours!
-
Nut Butter: Swap out strawberry jam for almond or peanut butter for a nutty, creamy filling.
-
Fruit Filling: Use your favorite jam like raspberry or blueberry; each brings its own unique burst of flavor.
-
Chocolate Delight: Add a spoonful of Nutella or chocolate ganache inside for a rich, indulgent treat that’s sure to impress.
-
Spiced Pear: Instead of jam, try spiced pear filling; it adds a warm, comforting taste reminiscent of fall.
-
Nutty Crunch: Sprinkle crushed nuts inside the filling for added texture and a satisfying crunch in every bite.
-
Vegan Option: Substitute the egg wash with a plant-based milk, and use dairy-free pie crust and fillings to keep it vegan-friendly.
-
Seasonal Sprinkles: Change your sprinkles according to the season; from pastel for spring to festive colors during the holidays, the possibilities are delightful!
-
Savory Twist: Experiment with cheese or ham for a delightful savory pop tart, perfect for brunch or a quick snack. Imagine a golden pastry that surprises with cheesy goodness inside!
Make Ahead Options
These Homemade Pop Tarts are perfect for meal prep enthusiasts! You can prepare the pie crust shapes and fill them with strawberry jam up to 24 hours in advance. Simply cut out the heart shapes, assemble them with the jam, and seal them as instructed. To maintain their quality, refrigerate them in an airtight container to prevent drying out. When you’re ready to enjoy, just bake them for 10-12 minutes as directed. This way, you’ll have freshly baked pastries that are just as delicious as if you made them from scratch each time, saving you precious moments during busy mornings or special occasions!
Chef's Helpful Tips
- Always preheat your oven to 400°F to ensure your Homemade Pop Tarts achieve that perfect, flaky golden brown finish.
- When unrolling the pie crusts, try to keep them flat and avoid any creases that could affect their shape during baking.
- Be generous with the strawberry jam filling, but remember to leave a small border to prevent overflow when baking.
- Keep a close eye on your pastries as they bake, checking them at the 10-minute mark to ensure they don’t over-brown.
Homemade Pop Tarts Recipe FAQs
How do I choose ripe strawberries for the filling?
Absolutely! When selecting strawberries for your filling, look for berries that are vibrant red, shiny, and firm to the touch. Avoid any with dark spots or excessive softness, as these might be overripe. For the freshest taste, pick strawberries that are in season, typically during late spring to early summer.
What is the best way to store leftover Homemade Pop Tarts?
Very simple! To keep your Homemade Pop Tarts fresh, store them in an airtight container at room temperature for up to 2 days. If you want to prolong their shelf life, the fridge is a great option; they’ll stay good for about 4 days. Just make sure the container is sealed tightly to maintain that delicious flavor!
Can I freeze Homemade Pop Tarts? If so, how?
Absolutely, you can freeze them! To freeze your Homemade Pop Tarts, first let them cool completely. Then, wrap each one tightly in plastic wrap and place them in a freezer-safe bag. They’ll keep well in the freezer for up to 2 months. When you’re ready to enjoy, you can reheat them straight from the freezer in a preheated oven at 350°F for about 10 minutes to restore their delightful texture.
What should I do if the filling leaks out during baking?
Don’t fret! If you notice some filling leaking out, it might be due to overfilling or not sealing the edges well enough. If this happens, it’s best to keep an eye on them while they bake, and place a baking sheet underneath to catch drips. Next time, be sure to leave a small border while spreading the jam and crimp the edges firmly for a better seal!
Can I make these Homemade Pop Tarts gluten-free?
Very much! You can absolutely make a gluten-free version by using gluten-free pie crusts available in stores or homemade gluten-free dough. Just ensure that all other ingredients, like the jam and sprinkles, are also gluten-free. This way, everyone can indulge in the joy of these delightful treats without concern!
Homemade Pop Tarts
Ingredients
Equipment
Method
- Preheat your oven to 400°F.
- Unroll the refrigerated pie crusts on a flat surface.
- Cut out heart shapes using a cookie cutter.
- Spread strawberry jam on half of the hearts.
- Beat the egg and brush it on the edges of the hearts.
- Seal the hearts with another crust piece and crimp the edges.
- Poke steam holes in the tops and brush with egg wash.
- Bake for 10-12 minutes until golden brown.
- Cool on a wire rack before icing.
- Mix icing ingredients and decorate with sprinkles.